
Buying a Used Dump Trailer: Inspection Checklist
A step-by-step used dump trailer inspection checklist: paperwork, frame, welds, floor, hoist, wiring, axles, tires and a test tow, plus a printable table.
By Strank Trailers12 min read
The short version
- The frame, crossmembers and hoist mounts decide whether a used dump trailer is a bargain or scrap. Inspect underneath first, then the cosmetics.
- Cycle the hoist all the way up and down, then let it sit raised. A slow lift, jerky motion, drifting or leaking seals all mean hydraulic repairs.
- Read the tire date codes. Trailer tires often age out before they wear out, and a set can cost several hundred dollars or more.
- Walk away from a bent or cracked main frame, a cracked tongue, missing or mismatched VIN labels, or title problems.
- Price everything else as a repair. Deduct the cost of tires, bearings, wiring, a pump or a cylinder from your offer.
On this page
- Before you go: questions to ask the seller
- What to bring
- Step 1: Paperwork and the certification label
- Step 2: The 20-foot walk-around
- Step 3: Frame, crossmembers and welds (underneath)
- Step 4: Bed floor, sides and gate
- Step 5: Hoist and hydraulics
- Step 6: Battery, wiring and breakaway
- Step 7: Axles, suspension, hubs and brakes
- Step 8: Tires and wheels
- Step 9: Coupler, jack and safety chains
- Step 10: Test tow
- Walk away, or price it in?
- Printable used dump trailer inspection checklist
- The bottom line
To inspect a used dump trailer, check the paperwork and VIN label first, then crawl underneath to inspect the frame, crossmembers and welds. After that, cycle the hoist, test the wiring and brakes, check the hubs and tires, and finish with a test tow. Structural damage is a reason to walk away. Almost everything else is a repair you should price into your offer.
This used dump trailer inspection checklist goes in that order. A printable checklist table is at the end. Plan on 45 minutes to an hour, and don't let a seller rush you.
Before you go: questions to ask the seller
Ask these on the phone. The answers will save you wasted trips.
- What's the VIN? Ask for a photo of the certification label, the sticker or plate on the front of the trailer near the tongue.
- Is the title in your name, and is it clean? No title, a bill of sale only, or a title in someone else's name are all problems.
- What did it haul, and how was it loaded? Mulch by hand is a very different life from demolition debris dropped from an excavator.
- Was it a rental or fleet trailer? Rental trailers see a lot of different drivers and loads. Some manufacturer warranties also exclude or shorten coverage for rental use.
- Was it stored indoors?
- What's been replaced or repaired? Ask about the pump, cylinder, tires, bearings, brakes and wiring. Receipts are a good sign.
- Can I cycle the hoist and tow it? If the answer is no, be cautious.
What to bring
- A tape measure and a flashlight
- Something to lie on (a creeper, cardboard or a tarp)
- A string line or long straightedge, for checking frame straightness
- A tire tread depth gauge
- Your truck, with a working brake controller and the correct hitch, so you can test the lights, brakes and tow
- A jack and wheel chocks, for checking hub play
- Gloves, and a notebook or this checklist
Step 1: Paperwork and the certification label
Every trailer built for road use in the US should carry a federal certification label. It lists the manufacturer, date of manufacture, GVWR (gross vehicle weight rating), GAWR (gross axle weight rating), tire size and cold inflation pressure, and the 17-character VIN.
Check that:
- The VIN on the label matches the title. If there's a VIN stamped on the frame or tongue, that should match too.
- The GVWR on the label matches what the seller advertised. "It's a 14K trailer" means nothing without the label.
- The tires on the trailer match or exceed the size and load range listed on the label.
A missing, painted-over or mismatched label is a serious red flag. It can mean a homebuilt trailer, a major frame repair, or worse. See GVWR, payload and empty weight explained for how to read the numbers.
Step 2: The 20-foot walk-around
Before you get close, stand back and look at the trailer from each side and from behind:
- Does it sit level when hitched to your truck? A nose-high or tail-low stance can mean wrong hitch height, tired springs or a bent frame.
- Does the bed sit flat on the frame all the way around, with even gaps? A bed that rocks or sits high on one corner points to bent bed rails, bent pivot hinges or a twisted frame.
- Are the sides straight? Bulged or pushed-out sides mean overloading or loader-bucket hits.
- Are both fenders the same distance from the tires? Uneven gaps can mean a shifted axle or broken spring hanger.
Step 3: Frame, crossmembers and welds (underneath)
This is the most important step. Lie down and work from the tongue to the rear with your flashlight.
- Main frame rails. Run a string line along the bottom of each rail from front to back. A rail that bows or kinks has been overloaded or hit.
- Tongue. Look for cracks where the tongue meets the main frame and around the coupler. This joint sees every bump and every hard stop.
- Crossmembers. Look for sags, bends and cracks, especially in the middle of the bed where loads land. Check that each crossmember is welded at both ends. Measure the spacing too. 16 inches on center is typical on heavy-duty trailers, and 24 inches suggests a lighter build.
- Hoist mounts. Scissor hoists mount to the frame and bed through brackets that take the full lift force every dump. Look for cracked welds, elongated pin holes and bent brackets.
- Rear pivot hinges. The bed pivots on these. Check for cracked welds, worn pins and excessive play.
- Spring hangers. Look for cracks at the welds where hangers attach to the frame.
- Repairs. Fresh paint over one area, lumpy or uneven welds, and added plates or gussets (reinforcing plates) that don't look factory all mean something was fixed. Ask what happened. A neat, well-made repair isn't automatically bad. A sloppy one is.
Learn to read welds in how to judge weld quality.
Step 4: Bed floor, sides and gate
- Floor dents and pillowing. Some dents are normal on a working trailer. Deep dents over a large area, or a floor that sags between crossmembers, mean the floor was overloaded for its gauge.
- Floor thickness. If you can reach an exposed edge at the rear, measure it. 7-gauge is about 0.179 inches thick and 10-gauge is about 0.135 inches. A caliper gives the most accurate reading.
- Rust. Check the seam where the floor meets the sides and the front wall. That's where water and grit collect. Surface rust is cosmetic. Flaking scale, pitting or holes are not. Tap suspect spots with a screwdriver handle.
- Cracks at the corners of the bed, around stake pockets, and where the side supports meet the top rail.
- The top rail should be straight. A bent top rail usually means a loader bucket hit it.
- The gate. Open and close the barn doors and the spreader function. Check the hinges, latches and chains, and whether the doors line up and seal.
- Ramps (if fitted) should be straight, slide out freely, and have intact welds.
Step 5: Hoist and hydraulics
Run the hoist through at least two full cycles. If you can, do one with some weight in the bed.
- Listen to the pump. It should run smoothly at a steady pitch. A struggling, slowing motor with a good battery can mean a worn motor, low fluid or an undersized system.
- Watch the lift. It should be smooth and steady. Jerky, stuttering motion can mean air in the system, low fluid or worn pivots.
- Hold test. Raise the bed partway and stop. Watch it for a few minutes. A bed that drifts down points to internal leakage in the cylinder or valve.
- Check for leaks. Look for wet fluid on the cylinder rod seal, the hose fittings and the pump. A little film is common, and drips are not.
- Inspect the cylinder rod for pitting, scoring or rust. A damaged rod chews up seals.
- Check the hoses for cracks, chafing and kinks, especially where they flex at the pivot.
- Check the scissor pivots and bushings for play. Grab the arms and try to rock them.
- Check the fluid level and condition. Milky fluid means water contamination.
- Look for a safety prop. Every dump trailer should have a bed safety prop or bar, and it should be there and work.
Common replacement parts for 2026 cost roughly $280 to $450 for a 12V pump motor or complete power unit, about $360 to $510 for a common scissor cylinder, and $2,300 or more for a telescopic cylinder, before labor. For troubleshooting background, see our guide to hydraulic troubleshooting when a dump trailer won't lift.
Step 6: Battery, wiring and breakaway
- Battery. Check its age (most have a date sticker), whether the terminals are corroded, and whether the box is secure and dry. Try the onboard charger or solar panel if it has one.
- Lights. Plug into your truck and check the running lights, brake lights, turn signals and clearance lights.
- Wiring. Follow the harness under the trailer. A factory sealed harness in conduit or inside the frame is good. Tape-wrapped splices, household wire nuts and wires dangling where they can snag mean someone has been patching it. Corroded wiring is one of the most common causes of electrical problems on older dump trailers.
- Remote. Test the hoist from both the corded and wireless remotes, if fitted.
- Breakaway. Pull the breakaway pin and try to roll the trailer slowly. The brakes should lock. Federal rules for commercial trailers require the breakaway system to hold the brakes for at least 15 minutes. Put the pin back afterward.
Step 7: Axles, suspension, hubs and brakes
- Springs. Look for cracked or shifted leaves, flattened springs and worn equalizer bushings. If it has torsion axles, check whether the arms sit at the same angle on both sides.
- Hub play. Chock the other wheels, jack one wheel off the ground, grab the tire at the top and bottom, and rock it. Noticeable clunking means worn or loose bearings. Spin the wheel and listen for grinding. Repeat on each wheel.
- Lubrication. On oil-bath hubs, check the oil level in the sight window. Milky oil means water got in. On grease hubs, look for grease slung onto the inside of the wheel, which suggests a failed seal.
- Brakes. During the test tow, use your controller's manual lever to apply the trailer brakes alone at low speed. The trailer should pull you down evenly, without veering.
Dexter's guidance for conventional grease-packed bearings is to inspect and repack every 12 months or 12,000 miles. If the seller can't remember the last time, budget for it.
Step 8: Tires and wheels
- Date code. The last four digits of the DOT code show the week and year the tire was made. For example, "1922" means week 19 of 2022. Many tire makers suggest replacing trailer tires around 5 to 6 years of age regardless of tread. Check your tire maker's guidance.
- Load range should match the certification label. Under-rated replacement tires are common on used trailers.
- Wear pattern. Even wear is good. Heavy wear on one edge can mean a bent axle or bad alignment. Cupping or flat spots can mean locked-up brakes or worn bearings.
- Sidewalls. Look for cracking (weather checking), bulges and cuts.
- Wheels. Check for cracks around the lug holes and for missing or mismatched lug nuts.
See dump trailer tires for load ranges and ST vs. LT tires.
Step 9: Coupler, jack and safety chains
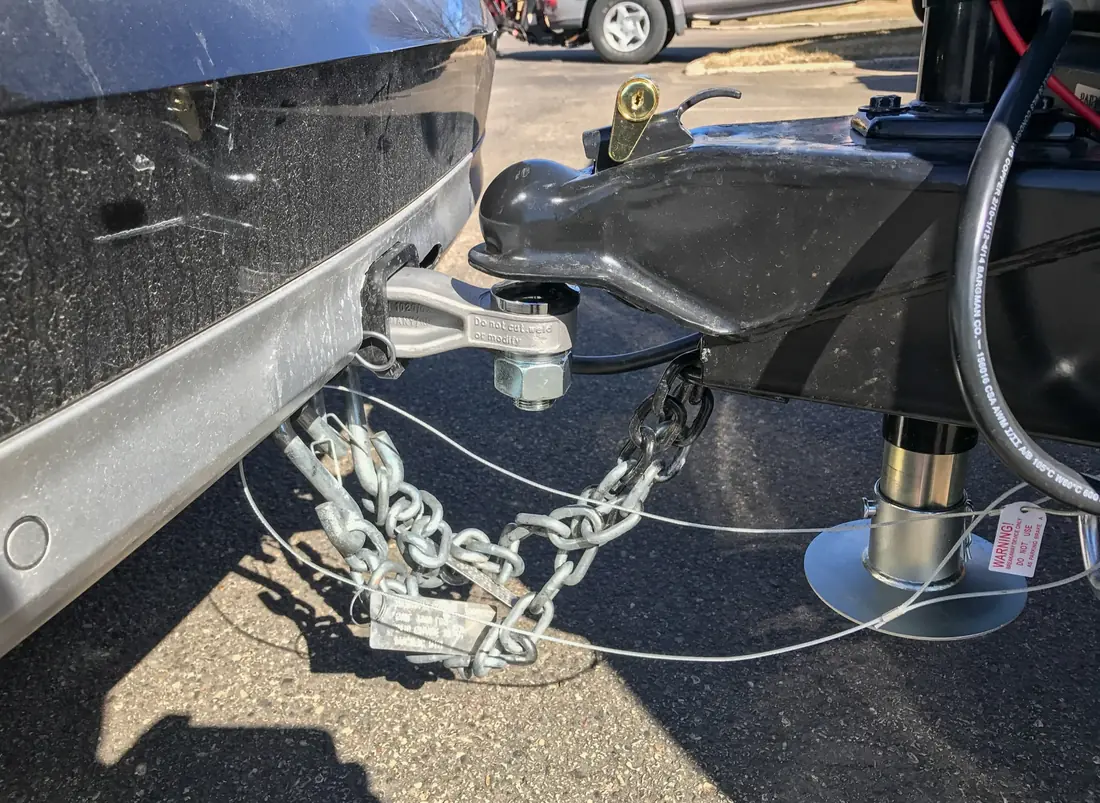
- Coupler. Check the latch operation and look for wear in the ball socket. On adjustable couplers, all bolts should be present and tight. On goosenecks, check the coupler tube and its pin or bolts.
- Jack(s). Run them all the way up and down. A bent jack leg means the trailer was dropped or dragged.
- Safety chains. They should be rated for the trailer, with intact hooks and secure attachment points.

Step 10: Test tow
Hook up and drive a short loop that includes a few turns and a stop from about 40 mph, if it's safe and legal.
- The trailer should track straight behind you, without wandering or shimmying.
- Braking should feel even and controlled.
- Listen for clunks, squeals or grinding.
Walk away, or price it in?
Walk away from:
- A bent or cracked main frame or tongue
- Cracked or poorly repaired hoist mounts or pivot hinges
- A missing, altered or mismatched VIN or certification label, or title problems
- A rusted-through floor or frame (holes, not surface rust)
- A seller who won't let you cycle the hoist or look underneath
Price it in for:
| Repair | Rough 2026 cost | Notes |
|---|---|---|
| Tires (set of four) | Several hundred dollars or more | Depends on size, load range and brand |
| Bearing repack and brake service | Parts if DIY, more at a shop | Get a local quote |
| 12V pump motor or power unit | About $280–$450 in parts | Plus labor |
| Scissor hoist cylinder | About $360–$510 in parts | Plus labor |
| Telescopic cylinder | About $2,300–$4,500 in parts | Plus labor |
| Full rewire | About $1,000–$2,500 at a shop | Spot repairs cost less |
| Battery | About $100–$250 | Deep-cycle |
| Blast and recoat | About $1,000–$3,000 | For a large trailer with widespread rust |
Then compare your adjusted price against new. See how much a dump trailer costs for 2026 new and used price ranges.
Printable used dump trailer inspection checklist
| Area | What to check | Red flag | OK / Fix / Walk |
|---|---|---|---|
| Paperwork | Title in seller's name. VIN matches title, label and frame | Missing or altered label, no title | |
| Label | GVWR, GAWR, tire size and load range | Tires below label rating | |
| Stance | Level when hitched. Bed sits flat on the frame | Bed rocks or sits high on a corner | |
| Main frame | String-line straightness, cracks, repairs | Bows, kinks, cracks | |
| Tongue | Welds at the frame joint and coupler | Any crack | |
| Crossmembers | Bends, sag, both ends welded, spacing | Bent or broken crossmembers | |
| Hoist mounts | Weld cracks, pin holes, brackets | Cracked or elongated mounts | |
| Rear pivot | Hinge welds, pin wear, play | Cracked hinge welds | |
| Floor | Dents, pillowing, thickness, rust at seams | Holes, heavy pillowing | |
| Sides and top rail | Straightness, cracks at supports | Bent rail, cracked supports | |
| Gate and ramps | Hinges, latches, spreader, ramps straight | Gate won't latch or seal | |
| Pump | Smooth, steady run with a good battery | Struggling or slowing motor | |
| Cylinder | Smooth lift, holds raised, rod condition, leaks | Drifting, drips, pitted rod | |
| Hoses | Cracks, chafe, kinks at the pivot | Weeping fittings | |
| Fluid | Level, color | Milky fluid | |
| Safety prop | Present and working | Missing | |
| Battery and charging | Age, terminals, charger | Swollen or very old battery | |
| Wiring and lights | All lights work. Sealed harness | Taped splices, dangling wires | |
| Breakaway | Brakes lock with the pin pulled | No breakaway or dead battery | |
| Springs and hangers | Cracked leaves, hanger welds, bushings | Cracked hanger welds | |
| Hubs | Play, noise, oil or grease condition | Clunking or grinding, milky oil | |
| Brakes | Even pull with the manual controller lever | Pulls to one side, no braking | |
| Tires | Date code, load range, wear pattern | Over 5–6 years old, edge wear | |
| Wheels | Cracks, lug nuts | Cracked wheels | |
| Coupler and jacks | Latch, wear, bolts, jack travel | Worn coupler, bent jack | |
| Test tow | Tracking, braking, noise, hub temperature | Wander, shimmy, one hot hub |
The bottom line
A used dump trailer is a good buy when the structure is straight and crack-free and the hoist lifts smoothly and holds. Inspect underneath first, cycle the hydraulics, read the tire date codes and do a test tow. Walk away from frame and title problems. Price in everything else, and you'll know exactly what you're paying for.
Frequently asked questions
What is the most important thing to check on a used dump trailer?
The structure: the main frame, crossmembers, tongue, and the welds at the hoist mounts and rear pivot. Bent or cracked structural parts are expensive or impossible to fix properly. Tires, wiring and pumps are replaceable.
How do I tell how old trailer tires are?
Find the DOT code on the sidewall. The last four digits are the week and year of manufacture, so 2321 means the 23rd week of 2021. Many tire makers suggest replacing trailer tires around 5 to 6 years of age regardless of tread, so check your tire maker's guidance.
Can a bent dump trailer frame be repaired?
Sometimes, by a skilled fabricator, but it's rarely cheap and the trailer may never track or dump quite right. A bent main frame or tongue is usually a reason to walk away unless the price reflects a major repair.
How do I check that a used dump trailer isn't stolen?
Make sure the VIN on the title matches both the federal certification label and any VIN stamped on the frame, and that the title is in the seller's name. Ask for ID. If the label is missing or anything looks altered, contact your state DMV or local law enforcement before you pay.
What is a fair price for a used dump trailer?
In 2026 listings, name-brand trailers a few years old in good condition often ask 60% to 90% of a comparable new trailer's price. Start from the price of a comparable new trailer, adjust for age and condition, then subtract the repairs you find during inspection.
Share this guide
Link to this guide
Writing about dump trailers? You're welcome to quote this guide and link to it. Copy whichever format you need.
- URL
- https://stranktrailers.com/guides/used-dump-trailer-inspection-checklist
- HTML link
- <a href="https://stranktrailers.com/guides/used-dump-trailer-inspection-checklist">Buying a Used Dump Trailer: Inspection Checklist</a> (Strank Trailers)
- Citation
- Strank Trailers. "Buying a Used Dump Trailer: Inspection Checklist." stranktrailers.com, October 28, 2026. https://stranktrailers.com/guides/used-dump-trailer-inspection-checklist
Keep reading
Specs · 10 min read
GVWR, Payload, and Empty Weight Explained
GVWR is the most a loaded trailer may weigh. Payload is GVWR minus empty weight. How to read the label, find real payload, and check tongue weight and GCWR.
Specs · 15 min read
How to Judge Weld Quality on a Trailer
How to judge weld quality on a trailer: spot undercut, porosity, cold lap, and cracks, find the welds that matter most, and know what to ask the builder.
Ownership · 10 min read
Dump Trailer Won't Lift? Hydraulic Troubleshooting
Dump trailer won't lift? Diagnose it step by step: battery voltage, ground, solenoid, low fluid, overload, air, stuck valves, cold fluid, and cylinder leaks.